Jump to:
Overview
You can create students up to your plan limit, and an unlimited number of groups.
Groups can be used to organize your students in different ways. Here are some examples:
- A single group for all of your students, or
- A group for advanced learners, one for middle learners, and one for those who working on simpler words
- A group for each classroom or intervention, if you are an intervention specialist working with multiple groups of students
Creating Students
To create Students, tap on the “Students” menu item.
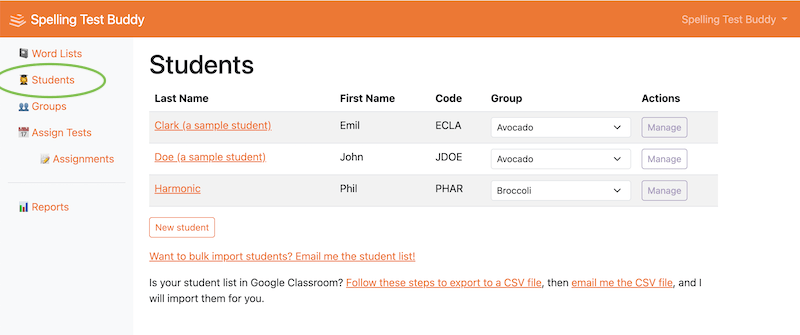
Tap on “New Student” to create a new Student.
Fill out their name and choose their Group (if you have already created it). When you move out of the last-name field, the system will generate a Student Code for you. This code is unique to each student, and is used to identify them in the tests.
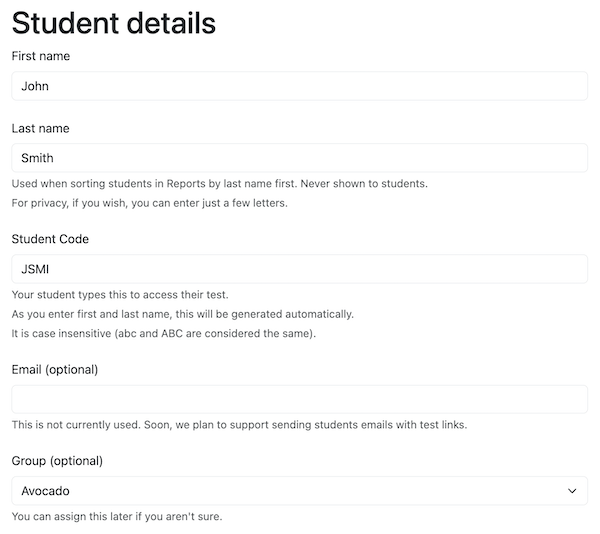
Save. If the Student Code is already taken, the system will update it automatically and let you know.
Bulk creating students
If you already have a list of students in another system, you can bulk import them from a CSV file instead of adding them one at a time.
Go to the Students page and tap on “Bulk Import Students from your CSV file”.
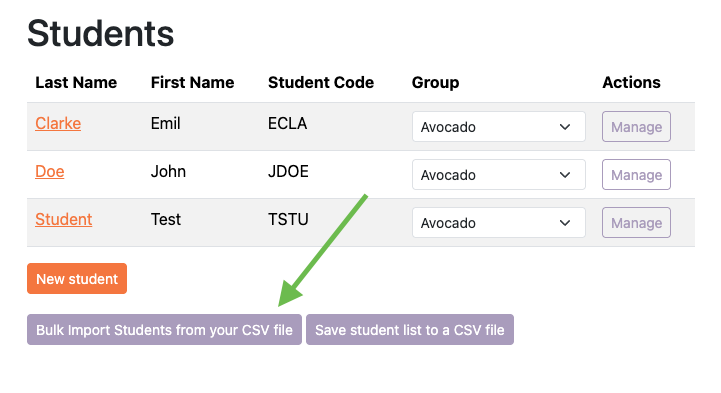
Then follow the easy four-step wizard to bulk import your students. You will upload your CSV list, preview the results, optionally map those students into one or more groups, and then finish the upload.
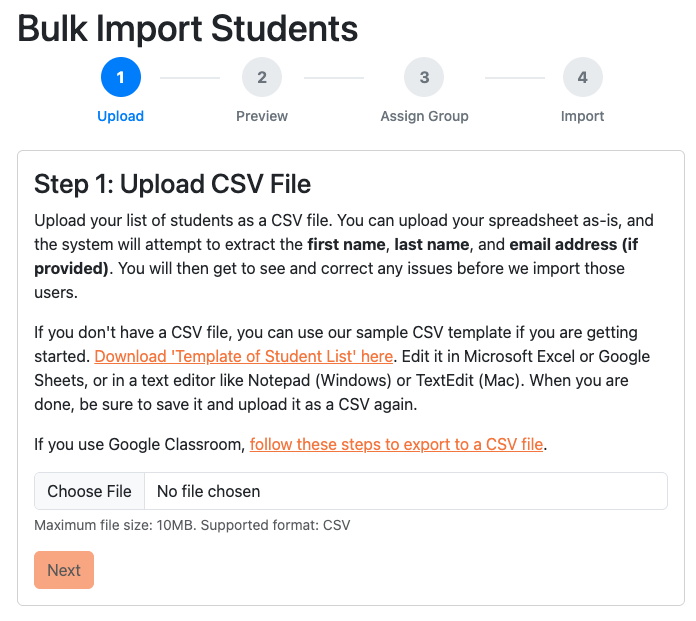
This works for Google Classroom, Seesaw, and other solutions as well.
Creating Groups
To create Groups, tap on the “Groups” menu item.
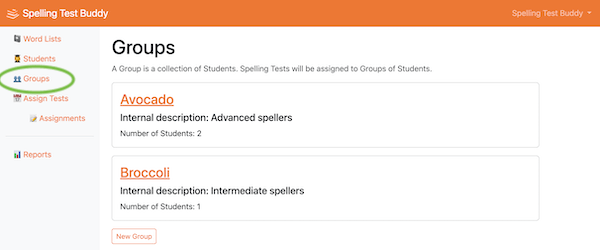
You can create a new Group by tapping on “New Group”.
Fill out the name and an internal description (optional).
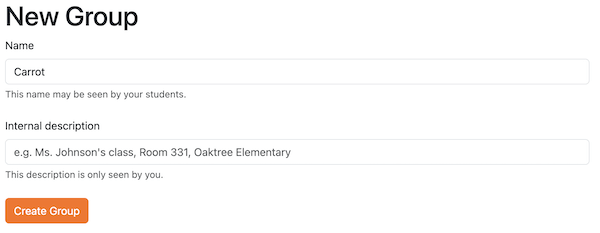
Tap “Create Group”.
Assigning Students to Groups
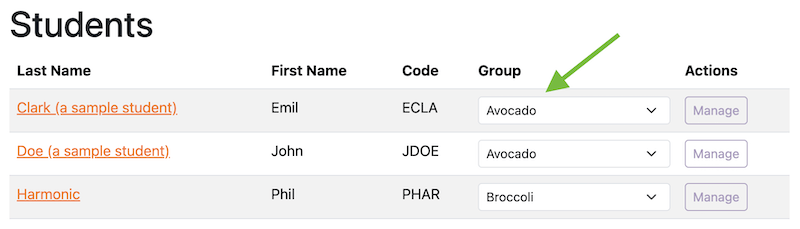
Now, let’s assign Students into these Groups.
The easiest way is to go to the Students page again, and, for each student, pick the Group from the dropdown.
Reset for a New School Year
Every new school year, you have a brand new batch of students. Want to clear them out quickly? You can do so from your Profile page.
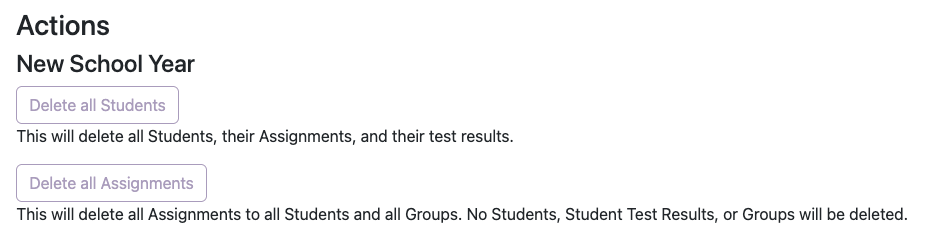
To clear out all of the Students in your account, along with their test results and assignments (if you are using Advanced Assignment Mode), tap on “Delete All Students”.
To clear out only the Assignments, and leave all Students, Student Test Results, and Groups, tap on “Delete All Assignments”. This is only useful if you are using Advanced Assignment Mode.